Vaultwarden in Proxmox LXC Container
Before We Begin
Before we begin, I am assuming that you have a Proxmox server setup and running. If you do not have a Proxmox server setup and running then I recommend you checking Proxmox Setup Guide . It is dense but it is a good read and will help you understand Proxmox better.
Picking a Container Template
Proxmox has a lot of container templates to choose from. I am going to be using the Debian 12 (Bookworm) template.
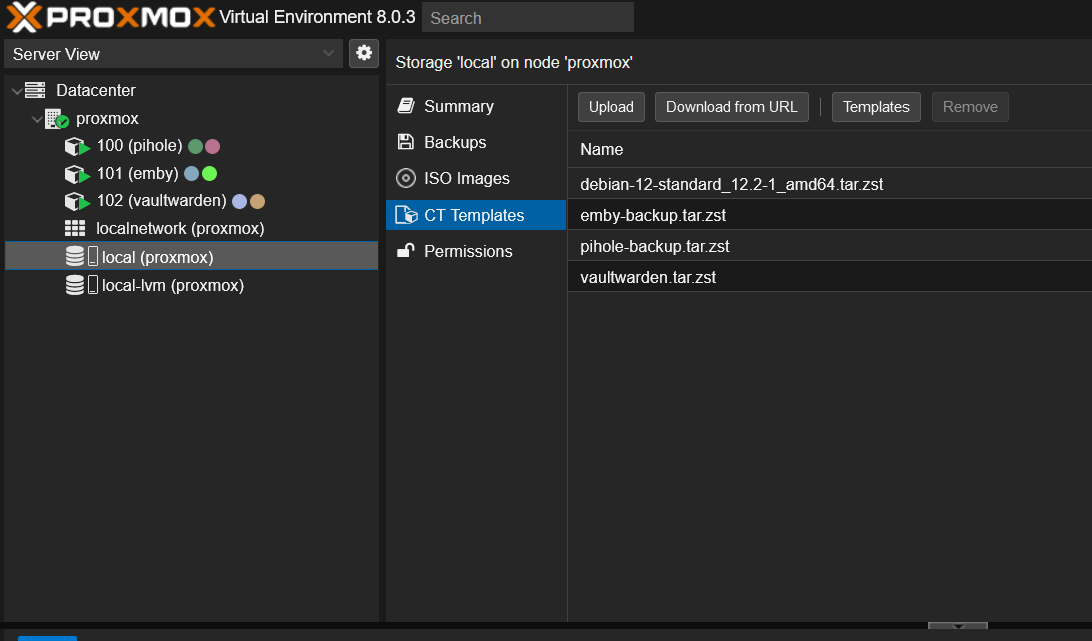
Stored CT templates
You well want to click on Datacenter and then Storage and then click on local. Find the “CT Templates” and click on it this well bring up a list of all the container templates available to you locally. If you have not downloaded any templates then you well see nothing.
Locate the Templates button. Find and highlight the Debian 12 (Bookworm) template and click on the Download button. This well download the template to your local storage. You can download an template you want just as long you able to install Podman . I well be using Debian, so all applications are installed using apt.
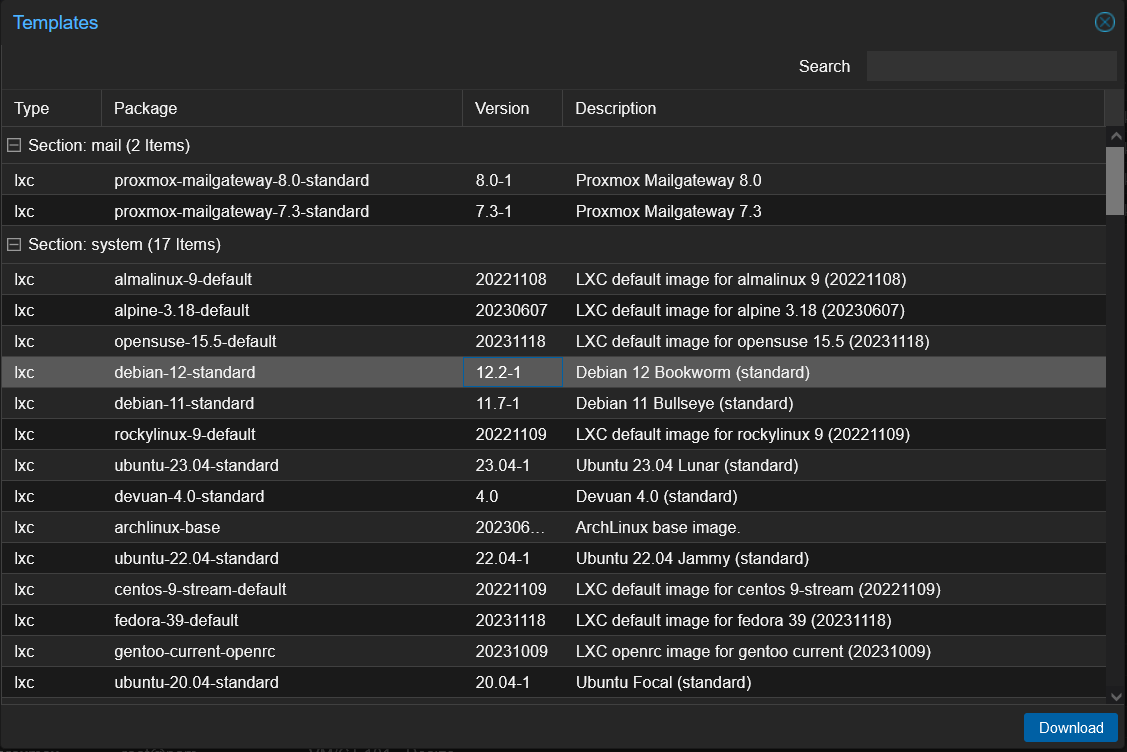
List of proxmox container templates
Setting up the Container
Creating a Container
Now that we have a container template downloaded we can create a container. Click on the Create CT button. This well bring up a window that well allow us to create a container.
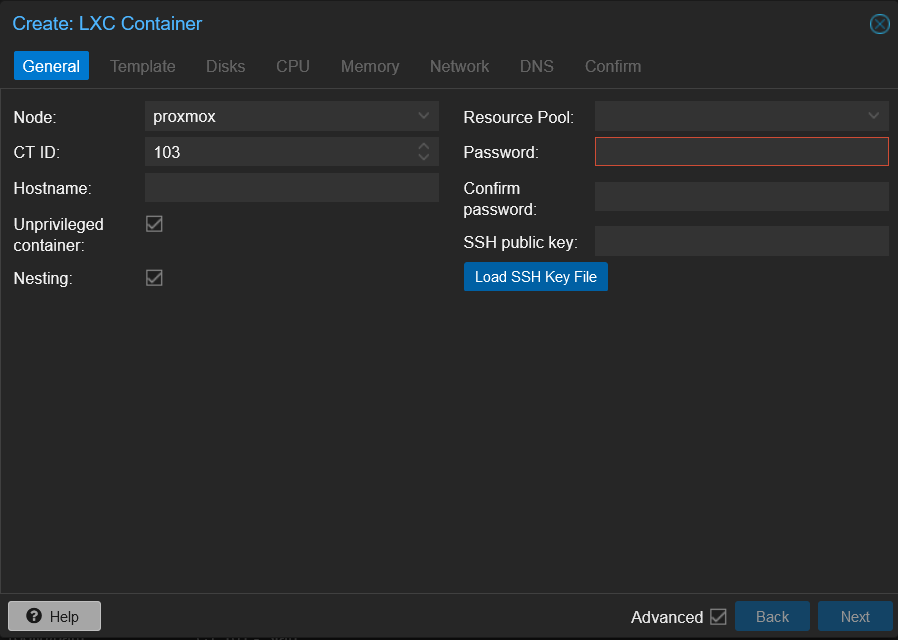
General info
You well want to leave the Node and CT ID as the default, this well be helpful for finding the backup of the container. What you well want to set is the hostname and password and SSH key if you have one.
NOTE: You may need to enable root login in/etc/ssh/sshd_configby settingPermitRootLogintoyesand then restarting the ssh service after the container is booted. Otherwise you well not be able to login over ssh.
The root password doesn’t have to be complex, but it is recommended that it not be too simple. Lastly make sure that nesting is enabled and unprivileged is disabled.
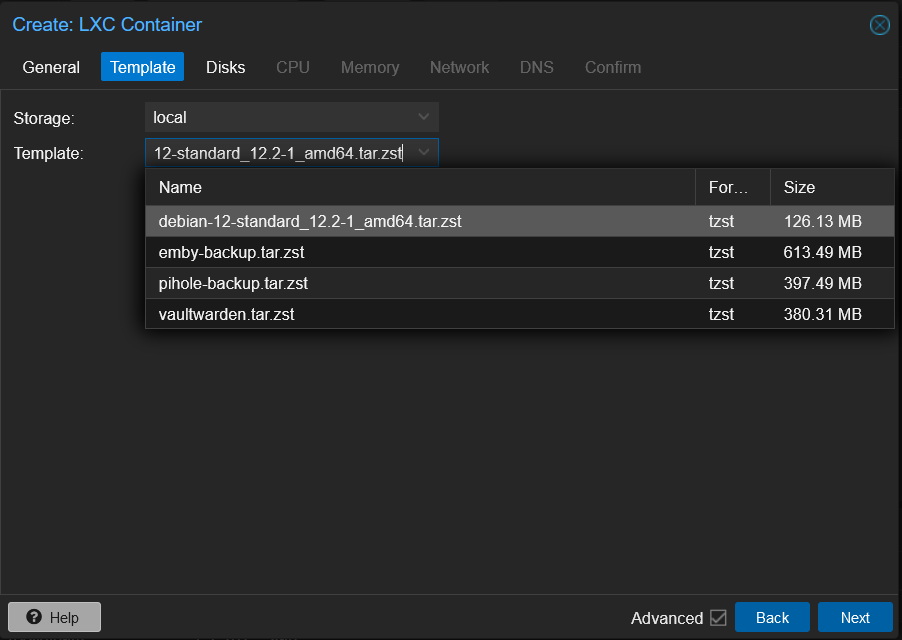
Selecting the template
Next we well want to set the Template to the template we downloaded earlier. The next thing is setting up the disk. I recommend setting the Disk size to 24GB, this well give you plenty of space for the container and the data that well be stored by the MariaDB database. Plus set mount option to noatime.
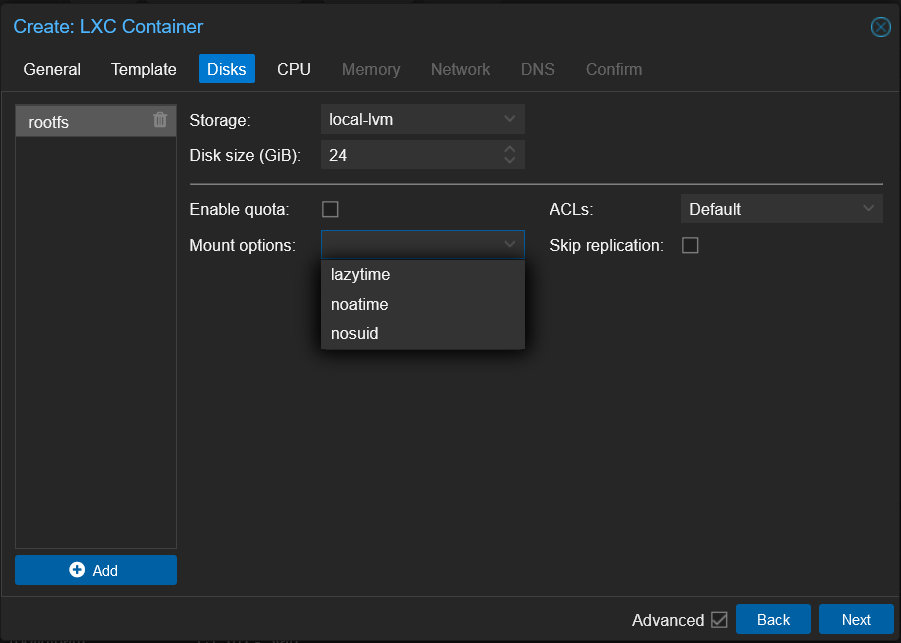
Setting up the drive
The CPU is next. You can leave the cores and sockets as the default value of 1 core if you wish.
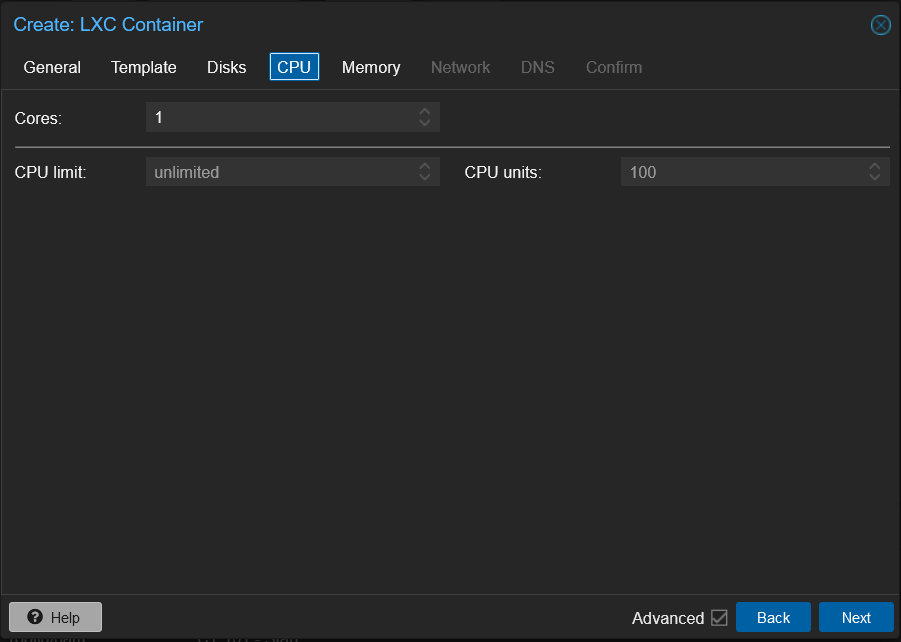
Setting up the CPU
Setting up the memory is next and this is different from setting up the memory for a VM. With LXC Containers you only need to set the memory and swap to what the container may need. The rest is shared with the host. I do recommend setting the memory to at least 1GB (1024MB) for both the memory and swap.
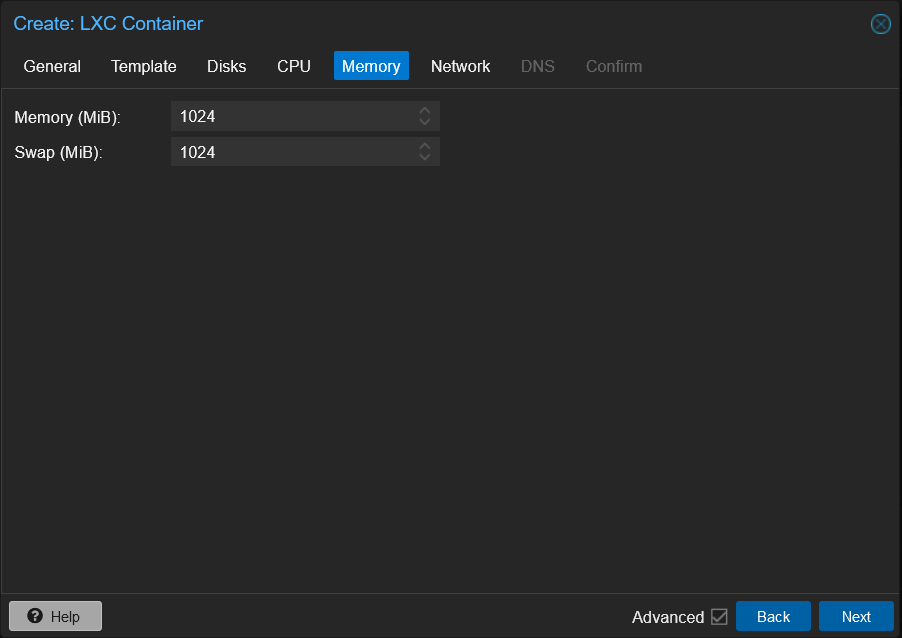
Setting up the memory
When it comes to networking you can leave network name and bridge as the default. However, you well want to set the IP address to a static IP address, outside of the DHCP range of your router is recommended. You well also want to set the Gateway to the IP address of your router.
The IP address and Gateway depends on your network setup the default gateway is 192.168.1.1 or 192.168.0.1. This means that the IP address of the container should be something like 192.168.1.100/24 or 192.168.0.100/24. The /24 is the subnet mask and is the default for most home networks.
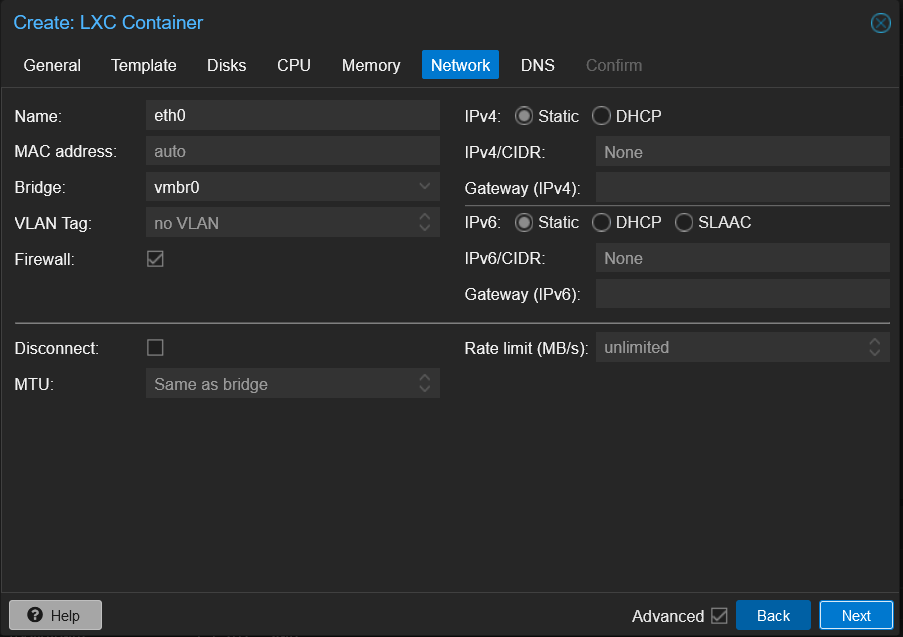
Setting up the network
The last two things to setup is the DNS which you can leave alone and confirming the settings. Once you have confirmed the settings click on the Create button. This well create the container and start it. You well want to however, leave the Start after created unchecked because we need to make some changes to the container before we start it.
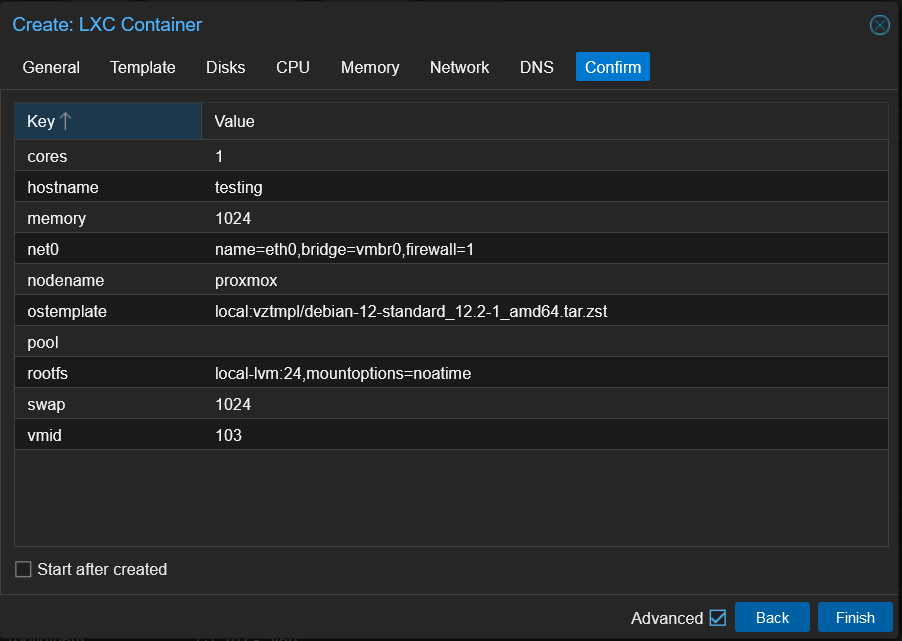
Setting up the DNS
Click the Finish buttom and wait for the container to be done baking. Once done there are some changes that we need to make to the container before we start it.
Fixing Options
Now that the container is created we need to make some changes to the container before we start it. Click on the container and then click on the Hardware tab. Find the Serial Port and click on the Add button. This well bring up a window that well allow us to add a serial port to the container.
The following options well need to be edited:
| Option | Value | Description |
|---|---|---|
| Start at boot | checked | Trust me you want this checked so that the container starts at boot |
| Features | checked | Enbale Nesting |
If you are wondering why the Nesting needs to enable here even though we enabled it when we created the container, that is because we disabled unprivileged.
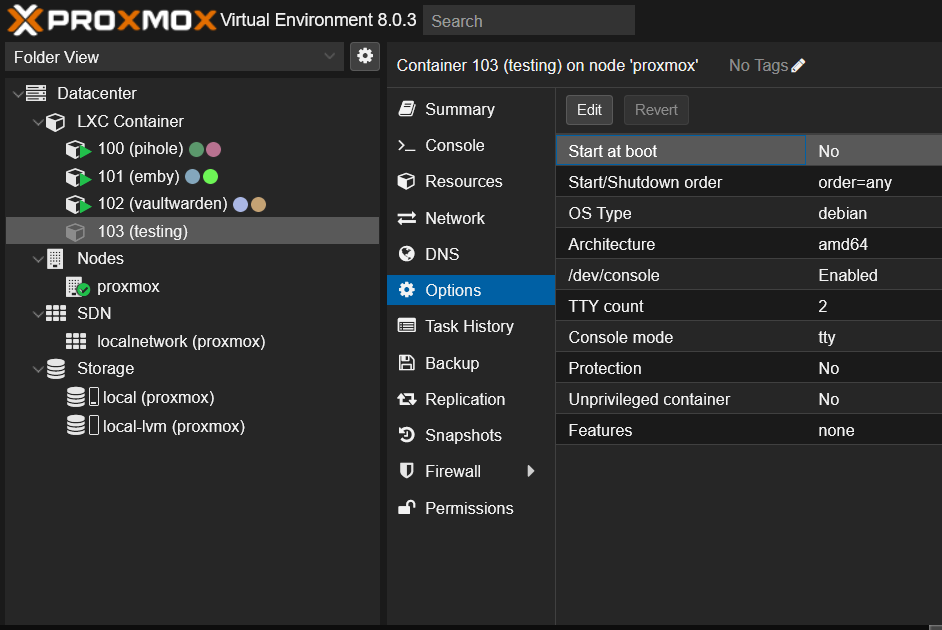
Change some options that got messed
Starting the Container
Now that we have made the changes to the container we can start it. Click on the >_Console button. This well bring up a console window that well allow us to login to the container. Now start the container.
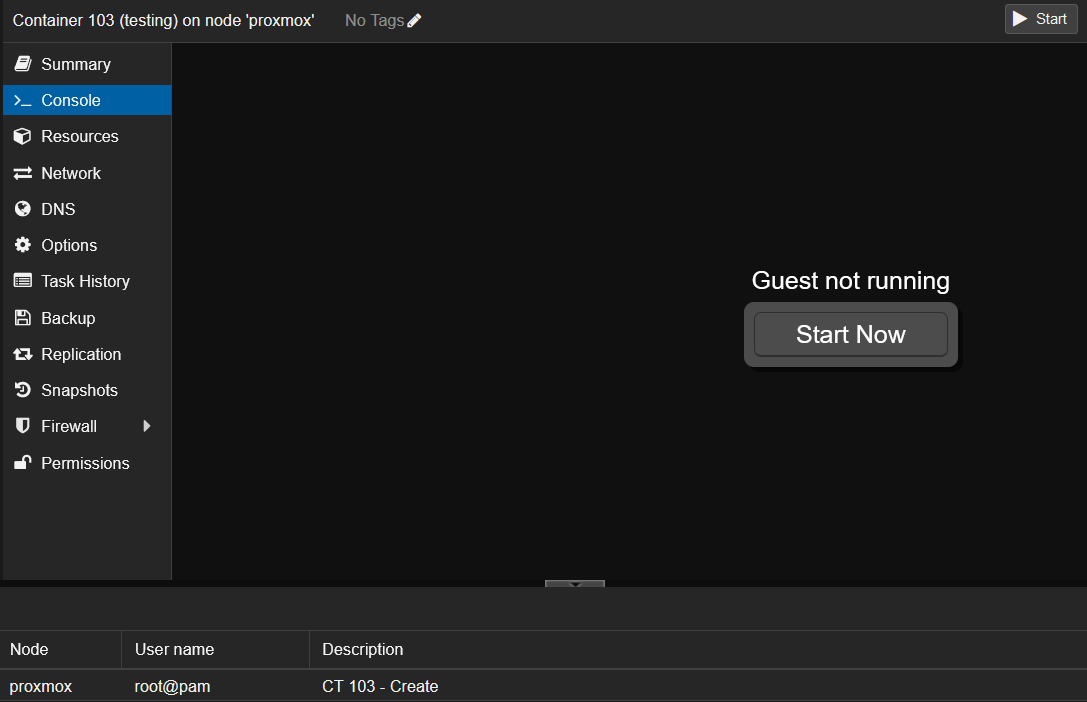
Console window
Once the container is started you well be greeted with a login prompt. Login with the username root and the password that you set when you created the container.

Login prompt
Updating the Container
A LXC container is just a chroot environment and is not a full VM nor like a Docker/Kubernetes container. This means that you can keep the container up to date with the latest packages from the repositories.
apt update && apt dist-upgrade -y
Install the following packages:
apt install -y curl podman mariadb-server
Edit the /etc/ssh/sshd_config file and set PermitRootLogin to yes and then restart the ssh service.
PermitRootLogin yes
To paste into the console window you can use Ctrl + Shift + V or Right Click and then click on Paste. Once you have pasted the text into the console window you can save the file by pressing Ctrl + s to save the file and then Ctrl + x to exit the editor.
systemctl restart ssh
Set the date and time to your timezone. For me that is America/Boise.
timedatectl set-timezone America/Boise
Once everything is updated you can reboot the container by clicking on the drop down menu next to the Shutdown button and then click on Reboot and login over ssh.
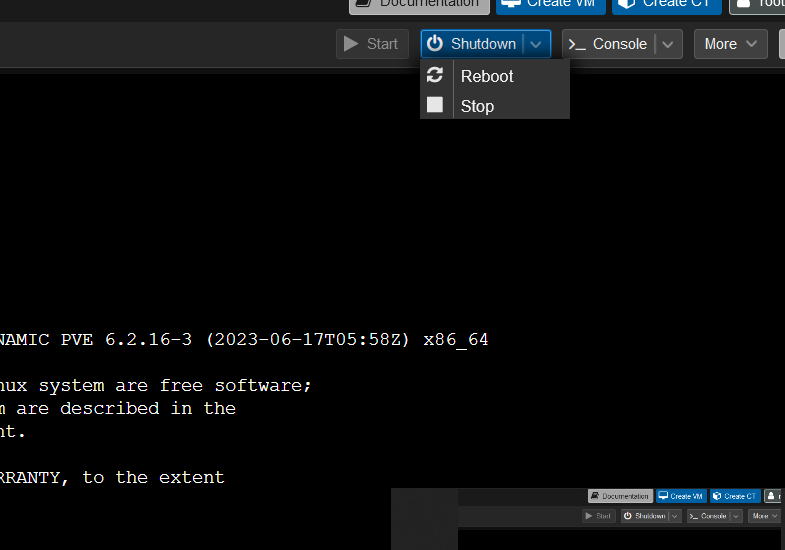
Updating the container
Setting up MariaDB
Now that the container is up to date we can start setting up MariaDB. MariaDB is a fork of MySQL and is a relational database management system. It is used by Vaultwarden to store the data that you enter into the web interface and the clients, like the username and password’s plus identity and payment information.
mysql_secure_installation
This well start the MariaDB setup wizard. You well be asked to set the root password, remove anonymous users, disallow root login remotely, remove test database and access to it, and reload privilege tables. You can leave the root password blank if you wish, but I recommend setting a password. Use the same password that you set for the container.
Answer N to not use unix_socket authentication plugin.
Answer N if you don’t want to change the root password.
Answer Y to remove anonymous users.
Answer Y to disallow root login remotely.
Answer Y to remove test database and access to it.
Answer Y to reload privilege tables.
Creating the Database
Now that MariaDB is setup we can create the database for Vaultwarden with mariadb command.
CREATE DATABASE vaultwarden;

CREATE USER 'vaultwarden'@'localhost' IDENTIFIED BY 'password';
Replace password with a strong password that you can remember. You well need this password later when we setup Vaultwarden.
GRANT ALL PRIVILEGES ON vaultwarden.* TO 'vaultwarden'@'localhost';
Enter quit to exit the MariaDB shell.
Using Podman to run Vaultwarden
You well notice that you well be using a Docker container to run Vaultwarden. This is because Podman is a drop in replacement for Docker and is more secure because it does not require root privileges to run containers. Therefore it doesn’t have its own init system. It is that lack of an init system that make podman more compatible with LXC containers. This is because LXC containers use the host’s init system and that is why we need to enable nesting and disable unprivileged when we created the container earlier.
Creating the Vaultwarden Container
Now that we have MariaDB setup we can create the Vaultwarden container. We well be using Podman to create and run the container, but first we need to create a directory to store the data that Vaultwarden well use mkdir /vlt/. This well create a directory called vlt in the root directory of the container.
podman run \
  -d \
  --name vaultwarden \
  --network host \
  -v /vlt/:/data/:Z \
  -e ROCKET_PORT=80 \
  -e DATABASE_URL='mysql://vaultwarden:password@127.0.0.1:3306/vaultwarden' \
  -e ADMIN_TOKEN="$(echo -n 'admin_token' | argon2 "$(openssl rand -base64 32)" -e -id -k 65540 -t 3 -p 4)" \
  docker://vaultwarden/server:latest
Replace password with the password that you set for the MariaDB database.
The ADMIN_TOKEN is a secret string that is used to access the admin console. If the command fails then you may need to install argon2 with apt install -y argon2, then rerun the command. Don’t worry about the argon2 command it is just a password hashing utility for the ADMIN_TOKEN that you picked. Just remember to replace admin_token with a secret string that you can remember.
What do all the options mean?
| Option | Value | Description |
|---|---|---|
| -d | Run the container in the background | |
| –name | Name of the container | |
| –network | host | Use the host’s network |
| -v | /vlt/:/data/:Z | Directory to mount to the container, and allow Vaultwarden to read and write to it |
| -e | ROCKET_PORT | The port Vaultwarden well be listen on: this should be port 80 or 443 if locally ssl signed |
| -e | DATABASE_URL | Set the database url |
| -e | ADMIN_TOKEN | Secret string for Vaultwarden admin console |
If you were setting the up on a VM or a physical machine with other services running on it then you would want to use a different port and not use the host’s network, but a bridged network instead. However, since we are using a LXC container and nothing else is running on the container then we can use the host’s network with no issues. I also recommend using port 80 because it is the default port for http which easier to forward with a reverse proxy like Traefik or enginx .
Another options and it is one that I use is Cloudflare Tunnel . This allows me to use a domain name and have it point to my home network. This is great because I don’t have to worry about my ISP changing my IP address and having to update the DNS records. To learn more about Cloudflare tunnel check out official documentation .
I have mine running on a Raspberry Pi 3B, but a Zero W or Zero 2 W well work just as well.
I may do a post on how I setup Cloudflare Tunnel in the future.
Setup Your First Vaultwarden User Account
If you see a long string of numbers and letters then you have successfully created the container. If you see an error then you may have mistyped something. You can check the logs of the container by running podman logs vaultwarden.
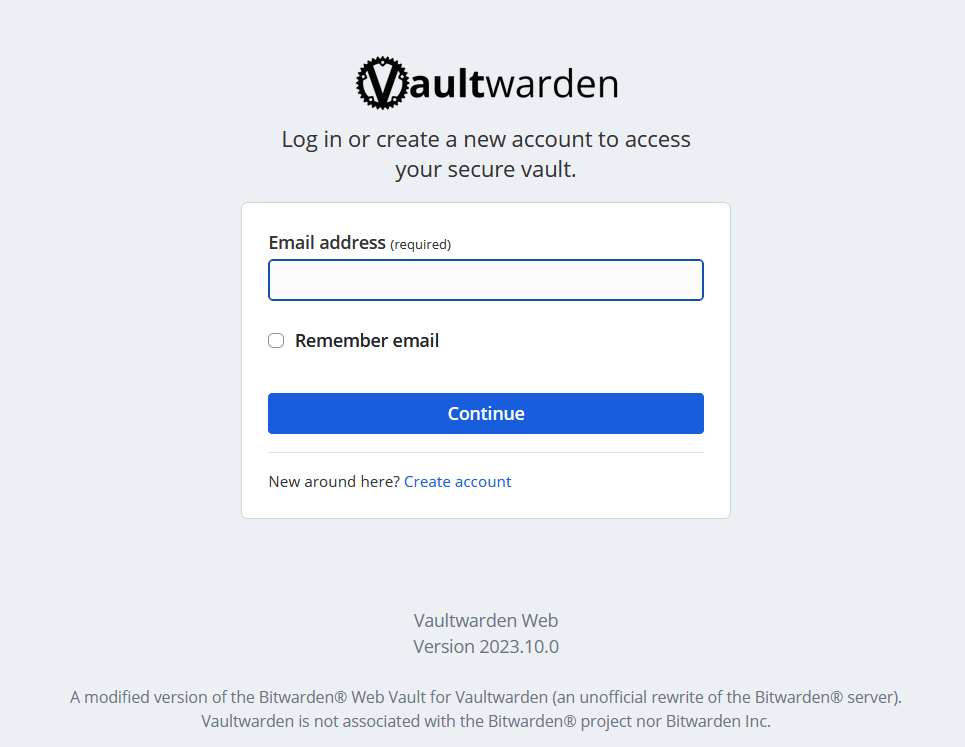
Login page for Vaultwarden
Since this is the first time that you have run Vaultwarden you well need to create an account. Click on the Create Account button and enter your email address and password. You well need to confirm your email address before you can login.
NOTE: The email address does not have to be a real email address. However, if you wish to setup email notifications then you well need to use a real email address.
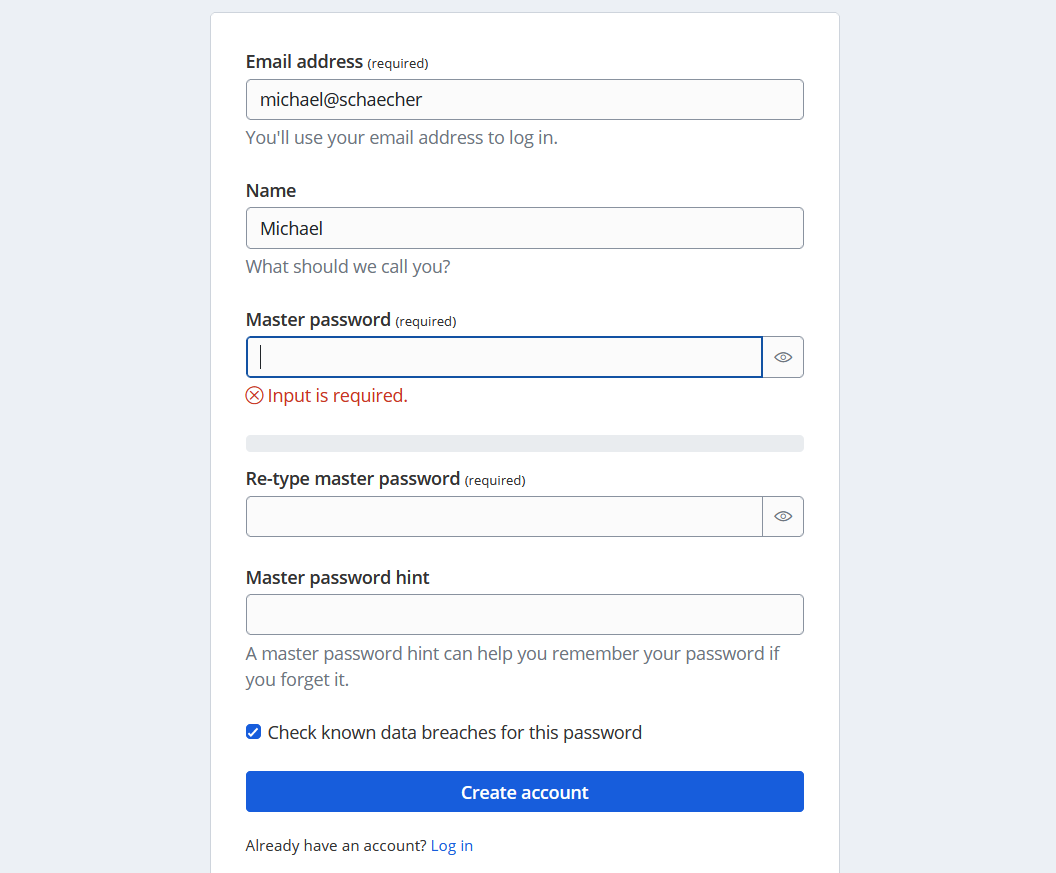
Create you user account
The master password should be a phrase that you can remember. If it is something that is common then use numbers, symbols, spaces, and capital letters. This well make it harder for someone to guess your master password.
After clicking on the Create Account button you well be taken to the login page. Enter your email address and password and click on the Login button.
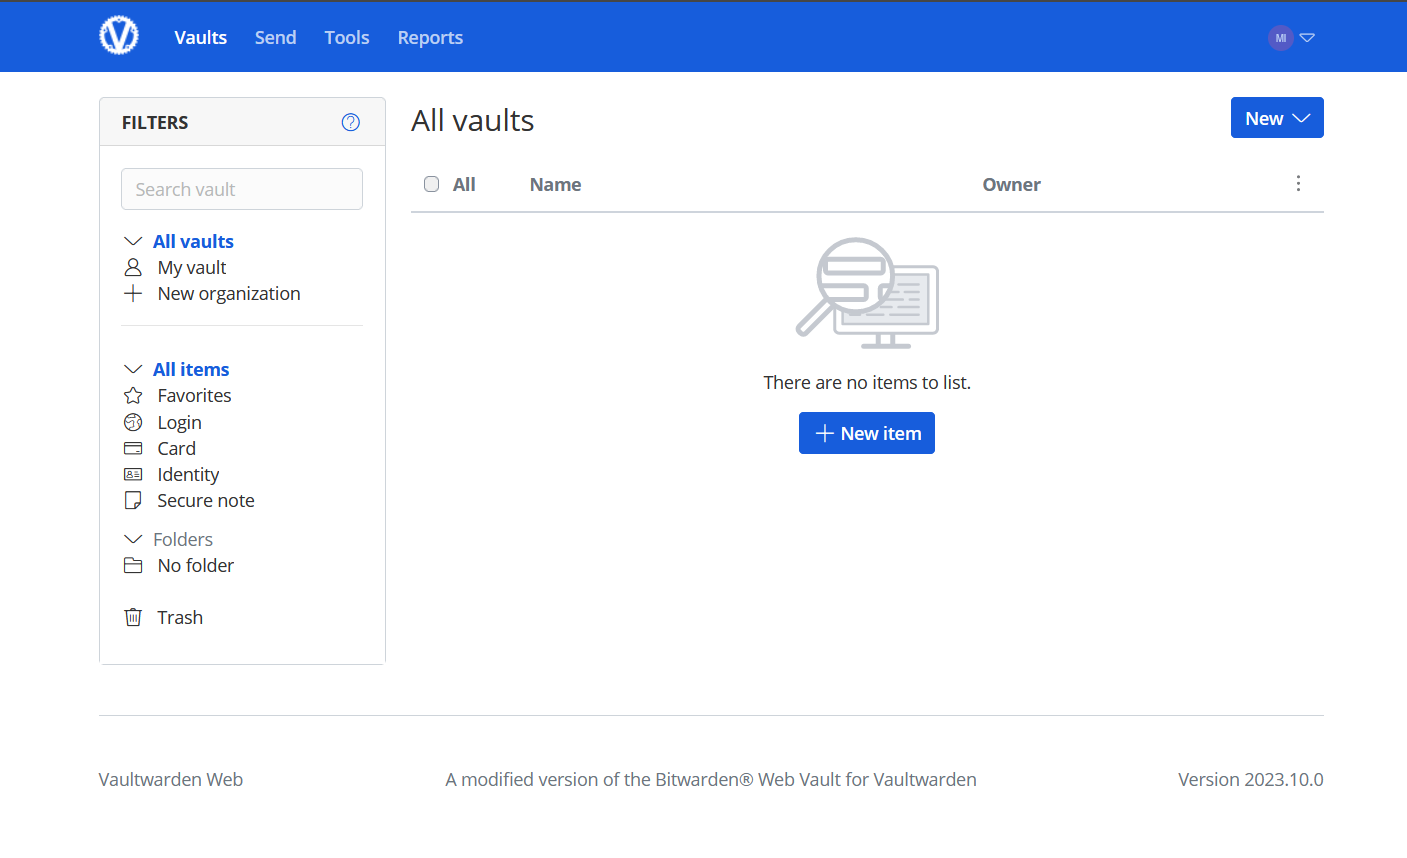
Logged in users home page
Importing Passwords
Importing passwords is easy, figure out what how to export your passwords from a web browser is the hard part since every browser is different. Because of this I well not go over how to export passwords from a web browser or from another password manager. That is something that you well have to figure out on your own.
Just know that vaultwarden supports importing passwords from other password managers and web browsers in multiple formats. You can find the list of supported formats here .
Making Vaultwarden Persistent
Now that we have Vaultwarden setup and running we need to make it persistent so that it starts when the LXC container restarts or the host rebooted Vaultwarden well start automatically. To do this we need to create a systemd service file using podman.
podman generate systemd --name vaultwarden > /usr/lib/systemd/system/vaultwarden.service
I like to use the /usr/lib/systemd/system/ directory for my systemd service files. You can use the /etc/systemd/system/ directory if you wish.
Now enable and start the service systemctl enable --now vaultwarden.service.
That is it you have successfully setup Vaultwarden in a LXC container on Proxmox. Now you can use the official clients to access your passwords and other sensitive information.